Configuring Pytest to Run Doctest
PYTHON PROGRAMMING

Modern Python projects are managed by pyproject.toml files. You can use it to manage both regular projects and Python packages, which makes this file a general tool to set up Python projects of various types.
The pyproject.toml file can contain everything your project needs, like:
- Metadata, such as the name of the project, version, authors, license, classifiers, URL, and description (both short and long).
- The configuration of the development and production environment, meaning dependencies and optional dependencies.
- Configuration of development tools, such as
[black](https://github.com/psf/black),[ruff](https://docs.astral.sh/ruff/),[pylint](https://github.com/pylint-dev/pylint),[pytest](https://docs.pytest.org/), and many others.
When the project gets big, you can move much of this information to other configuration files, like pytest.ini, requirements.txt, requirements_dev.txt, and so on. But when a pyproject.toml doesn't get overly long, I keep all the information inside it – this makes the project's root directory small.
This is just basic information about pyproject.toml files. If you want to learn more about using it, you can do so from here:
In this article, I want to discuss a specific scenario in which we can use a pyproject.toml file in order to configure pytest to run doctest tests. As you will see, it's very simple to achieve. With this simplicity, you will receive a very powerful tool: a test runner for both pytest and doctest tests. I will also show you how to configure doctests, including typical doctest flags and running doctest tests implemented in both documentation files and Python scripts.
In order to show how to do this, we will work with a brand new Python package. I'll create its structure using the makepackage package:
GitHub – nyggus/makepackage: Package for easy packaging of Python code
However, we will further configure it to meet our needs.
Since we're discussing testing with doctest, you should gain at least the basic knowledge of this module. You can read about it in the following article:
Create the package
We need to create the package first. For this, let's create a brand new virtual enviornment and install there makepackage:
> python -m venv venv-makepackage
> venv-makepackageScriptsactivate
In Linux, the above command would be:
$ source venv-makepackage/bin/activateLet's continue:
(venv-makepackage) > makepackage doctest_in_pytest
(venv-makepackage) > deactivate
> cd doctest_in_pytest
> python -m venv .venvScriptsactivate
(.venv) > python -m pip install --upgrade pip
Above, we created a brand-new project, doctest_in_pytest, created a new virtual environment for it, .venv, activated it, and upgraded pip.
Now, we need to install the package in the editable mode:
(.venv) > python -m pip install -e .[dev]This command will not only install our doctest_in_pytest package but also all the optional dependencies kept under the dev option: wheel, black, pytest, mypy, setuptools, and build. As you can see, doctest is not included in this list. This is because it's a module from the Python standard library, so it's installed with the Python installation.
The root directory of the project is the one in which the pyproject.toml file is located. It's where you will run the pytest command.
If you analyze the current code of the project (it's created using makepackage, so it does have some dummy code), you will notice that it combines pytest unit tests with doctest documentation tests. Running the former is simple, as it's enough to use the following command in the root directory:
(.venv) $ pytestTo run doctests from shell, you can use the following shell command, also from the root directory of the project:
(.venv) $ python -m doctest README.md doctest_in_pytest/doctest_in_pytest.pyThis runs doctests using the default configuration. Often, however, we want to use doctest flags, such as [doctest.ELLIPSIS](https://docs.python.org/3/library/doctest.html#doctest.ELLIPSIS) or [doctest.NORMALIZE_WHITESPACE](https://docs.python.org/3/library/doctest.html#doctest.NORMALIZE_WHITESPACE). Normally I use these two along with [doctest.IGNORE_EXCEPTION_DETAIL](https://docs.python.org/3/library/doctest.html#doctest.IGNORE_EXCEPTION_DETAIL). It's good to know doctest option flags; you can read about them in the doctest documentation.
You can provide them as CLI flags in the shell command, but it'll get quite long:
(.venv) $ python -m doctest README.md doctest_in_pytest/doctest_in_pytest.py -o ELLIPSIS -o NORMALIZE_WHITESPACE -o IGNORE_EXCEPTION_DETAILThis command runs doctest tests located in two files (paths are relative to the project's root):
README.mddoctest_in_pytest/doctest_in_pytest.py
If you've implemented doctests in multiple files, you can include them in the command above. Alternatively, to make doctests from different files independent, you can call the doctest command independently for each file.
The next section shows the essence of this article: configuring pytest in the pyproject.toml file, so that you can use just one short command to run both types of tests, with any configuration you need or prefer. The command could not be simpler, as it is just one word of six characters:
(.venv) $ pytestConfigure doctest in pytest in pyproject.toml
This will be simpler than you may think, but first let's recall what we need to configure to let pytest know what sort of command we want it to run:
- Paths to directories in which files with doctest tests are located
- Types of files to include
- Doctest flags
Below, you will find a block of code to include in the pyproject.toml file:
[tool.pytest.ini_options]
testpaths = ["tests", "doctest_in_pytest", "README.md"]
addopts = '--doctest-modules --doctest-glob="*.md"'
doctest_optionflags = [
    "ELLIPSIS",
    "NORMALIZE_WHITESPACE",
    "IGNORE_EXCEPTION_DETAIL"
]
I guess the code is self-standing, but let's analyze it line by line:
[tool.pytest.ini_options]This is a line you need to use to start the configuration block for pytest.
testpaths = ["tests", "doctest_in_pytest", "README.md"]Here, you provide paths to directories with files containing doctest tests. In our case, this is the tests/ folder with pytest tests and the doctest_in_pytest folder with doctest tests.
We can see an exception: the README.md file. What is it doing there? It's there because there's no way to include the root directory in testpaths. If you include ".", pytest will not include the file ./README.md when running tests.
It will, however, if you use the trick I used: provide the path "README.md". Of course, you won't have this problem if the main README file, located in the project's root directory, doesn't contain documentation tests you want to include in doctest testing.
addopts = '--doctest-modules --doctest-glob="*.md"'Here, addopts doesn"'t mean "adopts" but "add options". You can use this field to provide options to pytest that you would normally pass as CLI arguments.
We use two:
--doctest-modules: This means thatpytestshould run doctest tests located in Python modules, so files with the ".py" extension. Hence, this will not rundoctests inREADME.mdand any other files that are not Python modules, such as*.md,*.rst,*.txt.--doctest-glob="*.md": This requestspytestto include all Markdown files while runningdoctest. If you use a reStructuredText README file (README.rst), you need to changemdtorst.
doctest_optionflags = [
    "ELLIPSIS",
    "NORMALIZE_WHITESPACE",
    "IGNORE_EXCEPTION_DETAIL"
]
This is a straightforward command, which configures option flags for doctest.
And that's it!
In action
It's time to see our project in action. I'll utilize the code included in a new Python package created using makepackage. It'll meet our needs because it includes both pytest and doctest tests. However, since README.md doesn't include documentation tests, I'll simplify it significantly:
# Configuring `doctest` tests in `pytest`

```python
>>> import doctest_in_pytest as dip
>>> dip.foo(2)
4
>>> dip.foo(100)
10000
>>> dip.bar("Whatever!")
'whatever!'
>>> dip.bar("AAaa...!")
'aaaa...!'
>>> dip.baz("Whatever!")
'WHATEVER!'
>>> dip.baz("AAaa...!")
'AAAA...!'
When implementing doctests in Markdown files, remember that:

- `doctest` will run code for lines starting with the `>>>` prompt. It doesn't matter whether the code is included in a code block (like here) or in the text.

- Remember to add a blank line before each ````` ending code blocks. If you fail to do so, `doctest` will treat this line as part of the output of the preceding line. So, this code will fail:

```markdown
```python
>>> 2 + 2
4
because `doctest` will see that `2 + 2` evaluates to

```markdown
4
not to
4
Hence, you need to make it as follows:

```markdown
```python
>>> 2 + 2
4
Okay, time to run our testes. Let's consider several typical use cases.
### Run tests for particular file(s)
When you want to run tests for a particular test file, it's enough to run it in the following way:
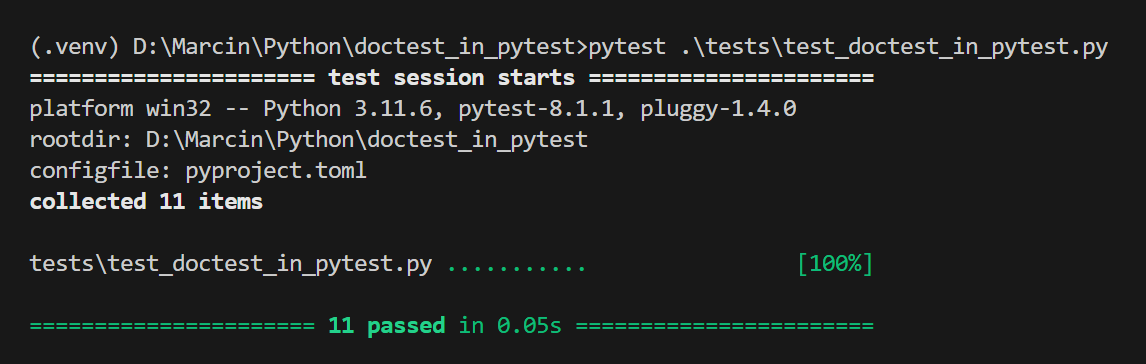
We can also use the same command to run doctests - it's enough to pass a path to a file with doctests. Look:
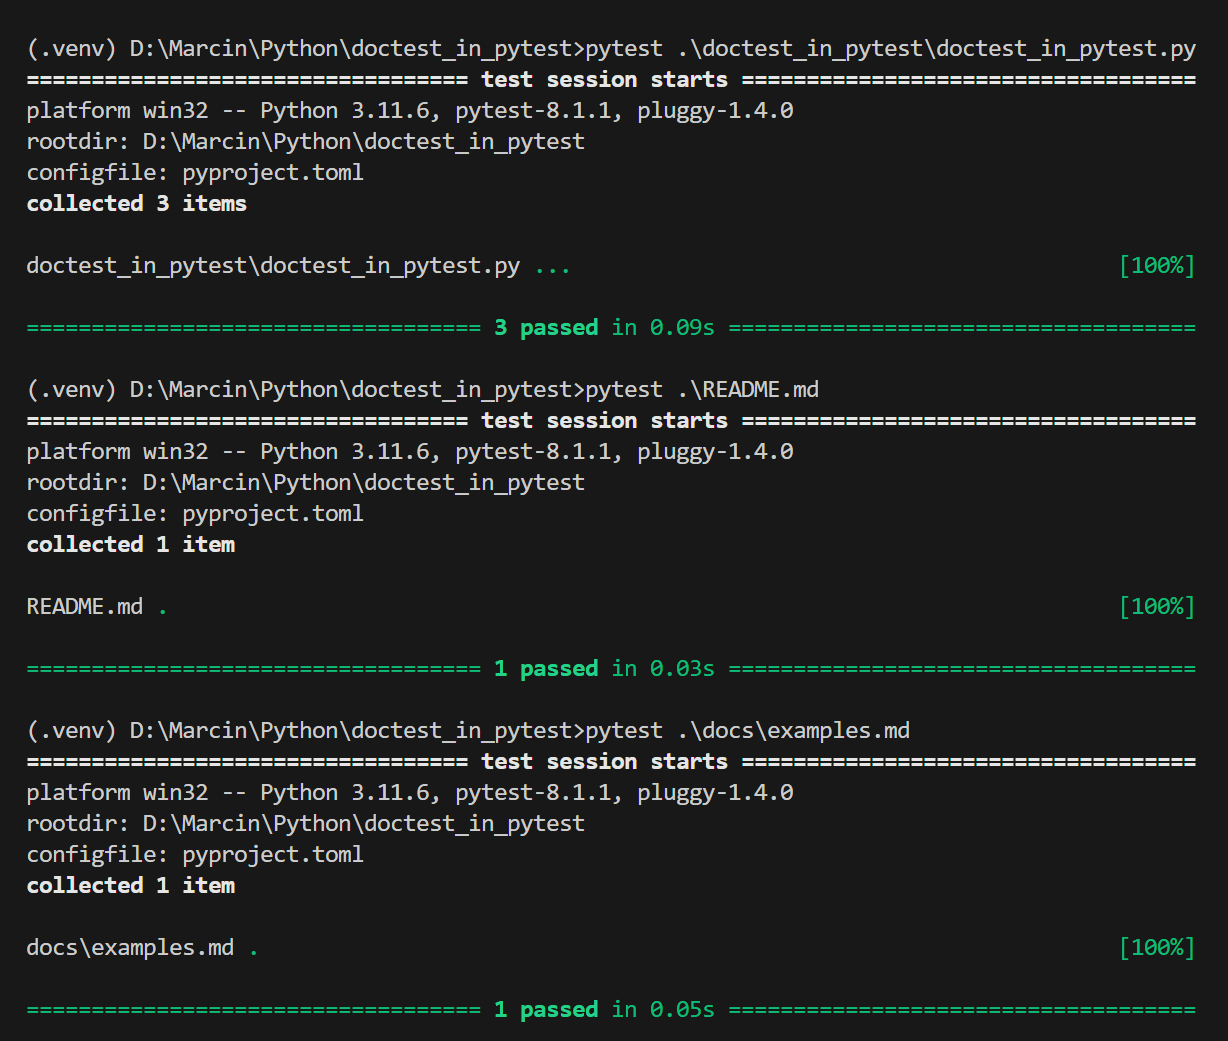
You can, of course, use two paths in one command:
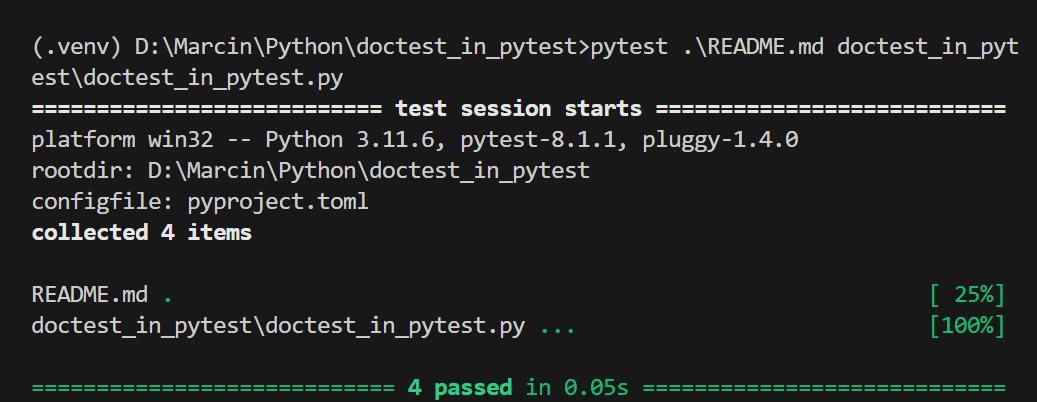
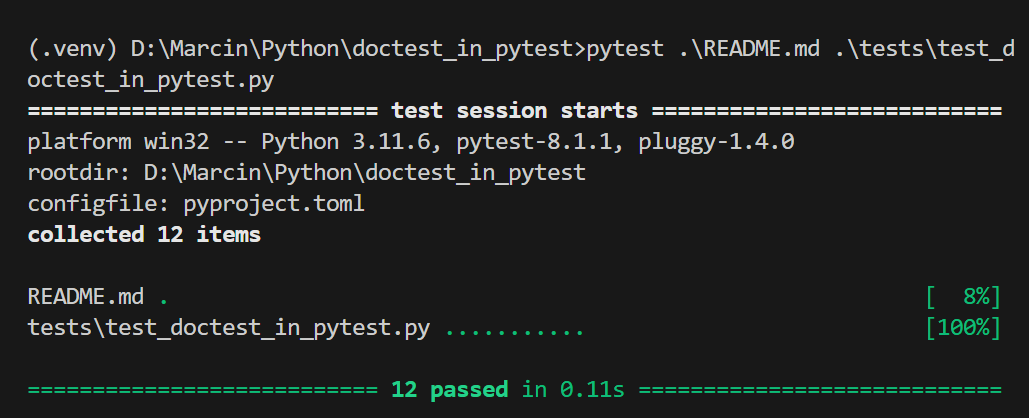
Above, we ran four doctests, one from the `README.md` and three from `doctest_in_pytest/doctest_in_pytest.py` files. We can also join `doctest` with `pytest` tests that way:
### Run all tests
With the configuration that we have in the `pyproject.toml` file, running all tests - including both `doctest` and `pytest` - is very easy. You need only one command:

And that's it!
### Documentation files in the docs/ folder
Let's consider one more scenario, quite frequent in Data Science. Let's create a `docs/` directory in the root folder, and we'll use it to keep documentation files about the project and the code. Let's add such a documentation file, say, `docs/examples.md`:
```markdown
# Configuring `doctest` tests in `pytest`
```python
>>> import doctest_in_pytest as dip
>>> dip.foo(2)
4
>>> dip.foo(100)
10000
>>> dip.bar("Whatever!")
'whatever!'
>>> dip.bar("AAaa...!")
'aaaa...!'
>>> dip.baz("Whatever!")
'WHATEVER!'
>>> dip.baz("AAaa...!")
'AAAA...!'
The contents don't really matter to us; what matters is that we can run `doctest` tests for this file and that the tests will pass.
Since the file is located in a new directory, `docs/`, we need to add it to the `testpaths` field in the `Pyproject.toml` file. If we don't, this file won't be tested, like below:

As you can see, nothing changed in the output, with 15 tests having been run before and now. Thus, let's modify the `pyproject.toml` file by adding the `docs/` directory to `testpaths`:
```ini
[tool.pytest.ini_options]
testpaths = ["tests", "doctest_in_pytest", "docs", "README.md"]
addopts = '--doctest-modules --doctest-glob="*.md"'
doctest_optionflags = [
"ELLIPSIS",
"NORMALIZE_WHITESPACE",
"IGNORE_EXCEPTION_DETAIL"
]We don't have to adapt the addopts field since the new file is also written in Markdown. Let's run the tests:

Mission accomplished!
The number of tests
There's an interesting – and sometimes important – thing to note and remember, just in case. Documentation files, like docs/examples.md or README.md, may contain many lines of code – but pytest will count all doctest lines from one documentation file as one test. Splitting the code into several code blocks won't help: the whole file will still contain only one test, at least when you're running doctest via pytest.
The above way of counting doctest tests works for documentation files. In Python scripts, you will have as many tests as you have docstrings with doctests. Remember this, since the number of tests that pytest reports can become confusing when you have long documentation files; no matter how long such a documentation file is, it'll be counted as one doctest test.
For this reason, don't try to compare the number of doctest and pytest tests using the report from pytest. It can be confusing and misleading.
Conclusion
We've learned how to use the pyproject.toml file to configure pytest to run both pytest and doctest tests, an approach I've found very convenient in my projects.
Before this approach, I treated these tests separately and ran them separately, which became inconvenient, especially when I wanted to run all tests, such as before creating a pull request. I resorted to creating shell scripts to run both types of tests with one command, which helped but had its drawbacks. For instance, running the doctest command with multiple flags made the command lengthy, so putting it in a script simplified things.
However, using the pytest command is even simpler and platform-independent. With the pyproject.toml file, I can configure everything I need, including various pytest options like testpaths and doctest options like flags. Once configured, the bare pytest command will use this configuration consistently.
Another advantage of this solution is evident in shared projects. Since running all tests requires only the pytest command, everyone in the team will run the same tests in the same way. Otherwise, if team members choose doctest flags individually, tests may pass for one member and fail for another.
I hope you'll find this simple technique as useful as I have. If you're a doctest user like me, you'll likely see that your workflow becomes smoother.
If you've avoided using doctest until now because you felt that running doctests disrupted your smooth development process, the technique discussed in this article will resolve your concerns. From now on, running doctest tests shouldn't pose any burden. In fact, you won't even have to remember to run them anymore – the project's configuration will handle it for you. Simply remember to implement doctests and ensure they serve as effective documentation tests.
In one of my future articles, I'll show you a related useful skill: creating pytest fixtures for use in doctest tests.
